Showing posts with label Fixing Stuff. Show all posts

Friday, 27 September 2019

Can't Turn Off Two Stage Authentication After IOS Upgrade

Quick Note: If you want to turn off Two Stage Authentication you have to act quickly, after two weeks, you will not be able to turn it off.

Quick Note 2: In numerous forum posts people have had success by ringing apple support (or look for a link in an email from apple inbox of your apple id email address).

Intro


I have just upgraded my iphone 5S from IOS 10 to IOS 14, and some where along the way apple turned on two factor authentication. This feature is terrible, especially when you share an apple account between more then one device (and who doesn't?). Every time you download an app, or scratch you nose you get the following:


When I looked up how to turn it off I was advised by apple website to go to security section of either iphone, or apple.com and simple turn off two stage authentication.  But in my case the option to switch off wasn't available.

Yes You Can Turn It Off

Apple - "If you don't see the option to turn off two-factor authentication on your Apple ID account page, that means you can't turn it off" - INCORRECT


YES YOU CAN - Either ring apple or look for the email link below.

Look for Email Link


The answer for me was a link in an email. Look for an email from apple (subject: Two-factor authentication enabled for your Apple ID) which give a link to "return to previous security settings".


The wording in this email is misleading. NO ONE has had access to my account. I received messages saying someone at the other side of country was accessing it, although this was at the same time my wife logging in with new password, and she was sitting next to me.

Why are Apple Pushing Two Stage Authentication?

In short this is a move by Apple to limit their risks at your expense. It is unnecessary security faff, which you don't need. But they do because it covers a legal loop hole for them no doubt. It is the same with banks, they keeping piling on security responsibility to the customer, it reduces their losses, at the expense of our time, and pretend they are looking after us.

Scientific Web Content

Google Maps Ranking

Friday, 6 September 2019

Mix and Match Netgear Powerline Adaptors

A few notes on mixing and matching different models of netgear power line adaptors. These tests were run on a PC with a cable connect direct to the router.

Screen shots were pulled from netgear Genie.

Original Setup

From left to right media store, router (gateway) and house. Total distance about 100m. Rouiter is in shed at bottom of garden. and house access point (connected to XAV2001 by cable) is furthest point.


Test Set Up

Removal of XAV5201 and test of speeds between two XAV2001.


Newer Adaptor at Router End of Line

So by putting the XAV5201 does this make thing better. I should point out that the XAV5201 is a newer model than the XAV2001, and has higher bandwidth. 


Older Adaptor at Router End of Line


There has been an improvement! What does this mean, does the newer power line gear receive signal better than the older stuff? I am not sure, if that were the case then wouldn't we see better TX results by swapping the other way around.


AV500. . .AV 200

Does matching power networking standards help things, both below are AV500 compliant . .  no it doesn't.


Conclusions

I haven't a clue! How about you? Please leave a comment.


Wednesday, 27 February 2019

Intensive Program Application is Causing PC to Freeze

Intensive Program Application is Causing PC to Freeze

This a a quick tip to get around a situation where a processor intensive program or application is causing you PC to slow down.  

This method assumes you have a multi core machine. 

Step 1 - Launch

Launch the application you intend to use. In this example Foxit Phantom PDF. 

Step 2 - Set Affinity 

Press Crtl+Shift+Esc to bring up Task Manager. Select the processes tab.


Right click on the process that is causing the system to slow. Click on "Select Affinity".


Deselect 50% of the check boxes, so that the program can only use a limited number of cores. This should free up some resources so you can carry on with other stuff, whilst the intensive application munches through its task in the background.

This is handy for modelling programs, batch image compression, video rendering and other CPU intensive operations.

Drainage Consultants


Wednesday, 17 October 2018

How to Fix Broken USB Charging Socket

If you are plugging a charging lead in to a socket and it is not work, it may be the socket itself, perhaps the contacts have become worn or damaged.

You should first try a few different charging leads to see if this helps. Also some devices need more than 0.5A current to charge so try a wall socket charger, rather than a USB socket on a computer.

Repair


The problem here is that when you try to remove the old socket ( I presume female micro USB) you may damage the board.

You will need a soldering iron and solar and buy a cheap micro usb lead from ebay with a female socket. If you use a lead you will avoid any mismatch in sizes, as the lead is bendy. Strip the wires and solder these on to the solder blobs at the rear of the broken socket. Another option might to be bend open the socket and solder on to the contacts inside there.

Before yo do this you will need to drill a hole for the lead and thread it through. Tie a knot in th lead to stop it pulling against the solder. Knot should rest on inside of casing with slack to prevent pulling on solder joints. Seal around cable with glue of some sort. Best silicone.

So best case you would end up with female lead poking out of casing. Which you can then charge into.

Flood Risk Reports

Monday, 19 February 2018

Scythe SY1225SL12L 120mm Review

Scythe SY1225SL12L 120mm Review - Intro


Around 2 years ago I decided to make my PC quieter by using 2 Scythe SY1225SL12L 120mm Fans to replace the main chassi fan and also to replace 2 smaller CPU cooler fans.


Very Normal Looking

I run a HP XW8400 with two dual core processors, with thermal output of 60W a piece. This arrangement worked well for 2 years. I occasionally run CPU intensive models, the rest of the time its just multitasking and PDF making.

Scythe SY1225SL12L 120mm Review - Noise Levels


The fan is almost silent run at 12V this fan spins at 800 rpm. It is so quiet you have to listen hard even to hear it. It is quieter than the Arctic Cooling F12. But the air flow is lower. . . . regardless of specs, you do not feel much air going through case with these fans. After a switch back to Artic Cooling F12 there was a notable draft going through the case.

Cobwebs - The BAdge of Long Service


Scythe SY1225SL12L 120mm Review - Cooling


As mentioned above one of these Scythe SY1225SL12L will adequately cool 2 60W processors under light use. It will not cool 2 x 120W processors. I recently upgraded to 2 quad cores and even at idle the fan could not dissipate that much heat.


Scythe SY1225SL12L 120mm Review - Conclusion


The Scythe SY1225SL12L is a well made, excellent value fan, which is virtually silent. It is a great options for those wishing to build a nearly silent PC.

0.03A - Very Small Power Consumption

The fan is quite partly because of the design of the thing, but mostly because it spins a lot slower than most fans. As it spins slower it moves less air. If you are using over a 100W processor then chances are you will need more air flow, even when run on 12V.

Environmental Permit Applications  

Desktop Study

Monday, 28 August 2017

PAM8610 Amplifier Review & Build

PAM8610 Amplifier Review & Build - Intro


I was very impressed with my 99p PAM8043 has enabled me to build a small portable speaker for just a few pounds.

Off the back of this success I thought I would build a more powerful portable speaker using a PAM8610, which costs . . . .  £1.99 so still a cheap project.

This is the board variant reviewed.


This more powerful board delivers 15W per channel, and runs on 12v (7v to 15v). I was hoping for more sound, which was delivered, but the quality of sound is far below that of the PAM8043.


PAM8610 Amplifier Review & Build - Power Supply


The 8610 will run on 7 x AA batteries (1300mah) for many hours at a moderate volume. A week's worth of morning and evening listening is achievable on one set of batteries, approx 12 hours. At full volume I would estimate 1 or 2 hours.

(2x15W) 30W / 12V would indicate a 2.5A current requirement, so if you choose a 12V AC adaptor for power probably best to go for 3A as a minimum.

The maximum voltage specified for this amplifier is 15V, the more volts supplies the greater the power output of the amplifier.

PAM8610 - More Volts = More Power (15 v Max)
I have tried this amplifier on  10.5V, 12V and 15V. I would say that after 12V there is little advantage to be had in terms of power output. When listening to music using headphone lead from iphone connected to amplifier, I can turn the volume to 90% running of 12V without distortion. At 15V I can turn it up to 70% without distortion.

So you may save the battery in you iphone a bit? But the extra volume is not worth the bother just stick with 12V. However, many SLA batteries will be near 15V fresh off the charge so it is useful to know that it runs well at this voltage.

It is interesting to note that many listing on ebay or elsewhere say that this amp will take 16V, the the specs it says 15V max. I will try it at 16V and see if it survives.

PAM8610 Amplifier Review & Build - Speakers


Many of the more complex boards using the PAM8610 require an 8 ohm speaker. But if you buy the basic board, then you can run a 4 ohm speaker . . .  the more complex boards do not really offer any advantages in terms of performance, although they are easier to use, with no soldering required (provided you have the right connectors!)


PAM8610 Amplifier Review & Build - Sound


The sound was a bit disappointing at first. It is a very mid tone heavy, to the point where it is harsh. Whilst the PAM8043, has a rich sound even when unfiltered this amplifier requires a low pass filter on the woofer, in order to make it listenable.

For example, without a low pass filter, you will require a graphic equaliser to try and remove some of the harsh mid range sound, and having tried this I can tell you it is not a very good option.

PAM8610 Amplifier Review & Build - My Set-Up


This project ended up looking a bit messy, because it had to be reworked so many times, attempting to get the right sound. In the end the addition of low pass filters was the breakthrough, that finished it off. I had tried stuffing the cabinet with wool to change sound, but this was unsuccessful.


The DIY low pass filter was easy to make. I just wish I had thought of it earlier. I had to make sure that the bass / mid range driver and the tweeter were fed separately through their respective filters.

Note size of PAM8610, very small. 

A close up of the amplifier and the wiring, between it and the speaker. The coil, shown below is the professionally made variant. Whilst above right, is a DIY effort that worked adequately.

Amplifier will happily sit on it own wiring, as it weighs next to nothing.
I did not worry about mounting the amplifier to the inside of the cabinet, as the the board is so light, it will sit happily suspended on its own wiring.


Environmental Permitting

Environmental Permit Applications

Thorpy's Non-Technical Speaker Crossover Guide

Thorpy's Non-Technical Speaker Crossover Guide


Intro


There are plenty of guides around on the web showing how to build speaker crossovers.

However, I found most be a bit mathematical. You will need maths if you a building the perfect set of speakers, but for a functional set, you can use these rough instructions. They worked for me.

Crossovers are normally hidden inside a set of speakers and so unless you are building your own boom box, or set of speakers, you may never have seen one before.

I have taken some of the more simple advice on the web and dumbed it down still further, for those who want to see some pictures, and just have a go.

I have no clue how any of this works. But I have built a boom box, with the below components, some homemade / DIY, and it works. So I would urge you to have a go too.

What does a Crossover do?


If you look at most speakers they have two drivers, a tweeter for treble  (high pitch sound) and a larger driver for mid range and bass (low pitch sound).

What does a cross over do? Well it filters the sound and delivers high frequency sound only to the tweeter, and low frequency sound to the large driver.

Do you need a Crossover?


Sometimes no. Sometimes yes. Most speakers have some form of crossover. But how can you tell if you need one:

Example 1 - A crackly / distorted / snicky sounding tweeter may require a filter to get rid of the low pitch sound, that it is not designed to handle. In this case you would want to filter out low pitch sound, with a "high pass filter", which can be done with a capacitor (see below).

Example 2 - A harsh sounding mid / bass driver that is getting too much treble. In this case you would need to filter out the high pitch sound. This can be done with a "low pass filter", this is done with an induction loop.

What do you need to build a cross over?

Here is a picture of my setup. (I am sorry to say that the capacitor in this picture is covered with glue, so it is a little hard to see. But it is there! Click on the image to make it bigger)

Ugly but Functional


Ingredients - You will need:


  • Soldering Iron & Solder
  • Insulated Copper Wire 2 or 3 Meters
  • Bi-Polar Capacitor 40V +
  • Sticky Tape
  • Glue
  • Chunky Steel or Iron "Core for Inductor"*

*I used the spindle from a industrial motor, but you could use a bit of scaffold pipe, or a big bolt or a piece of broken round file. It has to be iron or steel.

Install a High Pass Filter (also called a "Bass Blocker")


A high pass filter is very easy to install, you will need a bi-polar capacitor.

Polarised or Bi-Polar


Now as a general rule you should choose a capacitor with a voltage above 40V, but the higher voltages will also work, although they offer no advantage. The "uf" can be anything you like, and will probably work OK. Search here.

Just solder the bi-polar capacitor between the positive amplifier output and the the positive terminal of the tweeter. The the tweeter should be "fed" power through the capacitor.

Top Tip: Do not look directly at the capacitor when you power up you system. It may explode if you have chosen the wrong voltage or type (polarised or bi-polar). If you look the other way the bits won't go in your eyes.

Install a Low Pass Filter (also called a "Treble Blocker)


To make your low pass filter (induction coil) take around 2 to 3 meters of door bell wire, or other single cored insulated wire, and wrap is around your chunky steel or iron core. Leave enough spare wire poking out so you have enough to solder it to where it needs to go.

An Induction Coil - Very Techncial

Power needs to be fed to you bass speaker through this coil. So you wire one end to the positive supply from the amplifier and the other to the positive terminal of the speaker. (Scroll back up to the labeled picture to see how)

Conclusion

As mentioned this will not get you a top notch speaker, but it will make a horrible sounding speaker sound OK. 

By example, before installing these DIY crossover coils, I had to have the equaliser on my iphone on bass booster, and the sound was still too harsh.

After installing I can switch the EQ off, and they sound well balanced, I used an induction coil (low pass filter) taken from a professionally made speaker for the left hand side, and my DIY induction coil (low pass filter) on the right hand side. I cannot tell any difference by listening between the speakers. So the homemade one is working it would seem. 

For Reference - This is a professional made induction coil. Note PAM8610 amplifier bottom Right.

For reference I am using a PAM8610 to run this portable speaker, from 7 x AA batteries. The speakers were taken from some low quality active speakers. Also I should point out that you can get a pretty good bluetooth speaker for £30 / $50. So do not spend too much money on this unless you are doing it for fun!

Inside my DIY Portable Speaker


Environmental Permitting

Environmental Permit Applications


Friday, 14 July 2017

Make a Portable Speaker with PAM8403 Amplifier

Make a Portable Speaker with PAM8403 Amplifier - Intro


Do you have an old speaker or two hanging around in the garage or loft? Would you like to make a kick @$$ portable speaker for just £3 / $6? Left me show you how.

Lets get real here, you are not going to save lots of money you can probably buy a portable speaker, for you iphone or android phone direct from china for £6 / $12, but this way you get to save a trip to the dump, and get some satisfaction.

For more power you might try the PAM8610 or for complex Build the TPA3116

Old Speaker + £3 = Disco


Make a Portable Speaker with PAM8403 Amplifier - Ingredients


You will need the following ingredients:


  • An old speaker (4, 6 or 8 ohm) lower ohms = more volume.
  • Some wire (door bell, lead from old adaptor. . . )
  • Battery Holder to hold 3 x AA or 3x AAA batteries  
  • PAM8403 amplifier board
  • A drill 
  • screw driver
  • Soldering iron
  • solder
I have gone in to detail regarding the battery holder and the PAM8403 amplifier below.


Make a Portable Speaker with PAM8403 Amplifier - The Amplifier


You can buy the vanilla PAM8403 board on ebay for next to nothing but for a few £/$ more you could get hold of a blue tooth variant. This is useful if you want to use a phone without the 3.5mm jack socket.

There also variants with a volume control, and a smoothing capacitor. This may be worth getting if you do not have a spare capacitor

Bluetooth . . . . . volume control . . . . . or vanilla (normal) the choice to yours.

Make a Portable Speaker with PAM8403 Amplifier - Power Source


The amplifier run on a any voltage between 2.5V and 5.0V. This means you can power it with:


  • 3 x AA batteries
  • 3 x AAA batteries
  • USB power lead from PC or Wall Adaptor
  • 1 x 18650 Battery
  • A USB power bank
I have tried with a USB power lead, and then 3 x AA batteries both worked very well. 

The amp have two channels (left and right) and as far as I know you have to use both channels. You cannot splice the two channels together to make one. 

Make a Portable Speaker with PAM8403 Amplifier - How To

So the old speaker I have had a tweeter (small high frequency speaker) and woofer / midrange speaker. I used one "channel" from the amop for each. I cant remember which way around I put them. 

You will need to remove the cross over if there is one, save the capacitors for re-use.


In order to do this you will need to open up the speaker and, take a wire from either the woofer or the tweeter, you may find that you have a cross over unit in there, you will need to by-pass this so you can create two separate channels. Keep the cross over and carefully remove one of the capacitors for reuse, in a moment. You will need to solder this in to the positive wire of the tweeter. Like this:

Adding a capacitor as above will improve sound quality.

I first tried the amp and speaker together without this capacitor and the tweeter sounded distorted. However, after adding the capacitor all was well. 

The amplifier is tiny. . . note pinky (little finger) for scale.


Next up we need to start soldering all the bits together, if you do not have a soldering iron just buy one. They are useful for all sort of mending and fixing and making. As you can see the PAM8403 amplifier is tiny. And this makes for fiddly soldering, you can only use thin wire as the holes are too small for thick wire. 

Wiring is simple. . .but fiddly!


So for simplicity I house the wiring in a surface mounted junction box on the rear of the seapker, I had one of these spare in the garage. But you could actually just put all of the wires inside the speaker if you wanted to. Although it would be more fiddly to work on. 

3 x AA Battery Holder - £1.99


This cheap battery holder from ebay has a built in switch (counter sunk). I screwed it on to the rear of the speaker. With 3xAA batteries in side in produced 4.5V, good quality rechargeable batteries are preferable to disposable, as they hold a higher charge for longer, so voltage stays are close to the optimum (5V) as possible. 


Toggle switch. . . if you like.


I also added a toggle switch that I had as it is a nicer switch to use, than the one on the battery holder. You can also use a piece of cord, rope or strapping as a carry handle. 

Carry Handle


Make a Portable Speaker with PAM8403 Amplifier - Performance 


The sound level of the finished speaker (4 ohms / 4.5V ) is approximately 60 - 70 decibels. You cannot really have a normal conversation in the same room. As a 35+ year old man, I find it unpleasantly load at full volume.

There is quite a lot of midrange and high pitch sound, and perhaps some more bass would be a good, but overall for a piece of hardware that cost 99p, and is the size or a postage stamp it is amazing . . almost alchemy in terms of its performance. 

This is a fun, low cost project that I have enjoyed doing, and I would urge you to do the same if you require a speaker of this type rather than buying some other hard to recycle item from china.


Environmental Permit Applications

Thursday, 13 July 2017

Living with iOS 9.3.5 on an iPhone 4S

Living with iOS 9.3.5 on an iPhone 4S  - Intro


I have been avoiding upgrading my iOS since iOS 7. However, on wednesday night I drank too much red wine and upgraded, because an app I wanted to use requires iOS 9 or higher.

What a mistake to make. My snappy adequately fast phone was rendered sluggish and virtually useless. So what can I do?

Living with iOS 9.3.5 on an iPhone 4S  - Down-Grade - NO WAY


Apple must know that older devices will not run there newer iOS properly, and hope that the performance of iOS 9 on older devices will force people to upgrade. For this reason they do not offer a way to downgrade your iOS. 

There is one exception, and that is 6.1.3 which is still "signed" for use on the iPhone 4 (not 4S). There is 3rd party software avaiable to do this, if you have iOS 9.3.4, but not for iOS 9.3.5.

So this is impossible for 9.3.5.

Living with iOS 9.3.5 on an iPhone 4S  - Jail-Break - NOOOO WAY


This is also not possible, iOS 9.3.5 is not jail-break-able.

Living with iOS 9.3.5 on an iPhone 4S  - Re-Install and Performance Mods - WORTH A SHOT


This is the only way left for people, and I think by following the below steps you can claw back the usability of you iphone 4S.

9.3.5 Reinstall

  1. Back-Up Your Iphone (Use iTunes)
  2. Reset (Settings > General) Choose (Erase All Content and Settings) 
  3. Restore from Back Up when Done.
Note: This freed up a lot of storage space for me. Despite having most the same apps and music on the phone after restore. Perhaps the old iOS is not deleted from the phone when it is upgraded?

9.3.5 Performance Mods


Do the following:
  1. Turn Off Animations (Settings > General >Accessibility)
  2. Turn Off Transparency (Settings > General >Accessibility)
  3. Turn Off Back Ground App Refresh (Settings > General)
  4. Enable Low Power Mode (Settings > Battery)
  5. Delete All Unwanted Apps (Hold Down Any App Icon Until Wobble)

Living with iOS 9.3.5 on an iPhone 4S  - Conclusions


APPLE! It should not be like this, serve the customer please. If I want to install Windows 3.1 on my PC I can. . . . this means I do not have to send my old PC to india, for kids to dismantle, and go to early graves with lead poisoning. . . there is a moral element here!

Every time you make a new iphone there is also a carbon cost, it is no good prattling on about how considerate you are in you CSR reporting if your belligerent attitude towards legacy hardware is causing mountains of E-Waste, and unnecessary Carbon Emissions. You know global warming, that thing that Trump Ignores. . . but then he is a pretty good guy after all.   


Illustrator Devon


Tuesday, 7 June 2016

LBP7100Cn LBP7100Cn Power Saving / Sleep Mode / Auto Shutdown

LBP7100Cn  LBP7100Cn Power Saving / Sleep Mode / Auto Shutdown


The below instructions can be found at the following link:

LBP7100Cn  LBP7100Cn Power Saving / Sleep Mode / Auto Shutdown

I had assumed with was a power saving mode on the LBP7100Cn  LBP7100Cn which of course it does save power, but could not find how to turn it off.

Canon call this feature "sleep" or "auto shutdown" rather than power saving mode both of which you can turn off from the below menu. .

This is a must if your printer is on a network remote from where most of the users are.


Environmental Permit Applications  

Wednesday, 27 April 2016

Thorpy's Guide to Buying an EBike Battery

Thorpy's Guide to Buying an EBike Battery - Intro


There is only one thing worse than shopping for shoes with your wife or girlfriend, and that is buying an ebike battery. The variety of shops to buy from is large with branded systems (think Bosch) costing a small fortune, and cheaper "brand x" (i.e. unbranded) batteries still costing a painful amount but having no warrantee or support of any kind.

So what to do? I have been looking at batteries for around 2 weeks on and off, and I have found the choice a difficult one to make, mainly because lithium batteries are so expensive, and I am not used to spending that much money on bicycle components.

A good lithium based battery can cost upwards of £250 ($400), even if purchased direct from China, so its worth taking time to consider. Expect to pay a minimum of £300 for a quality battery purchased in the UK.

Thorpy's Guide to Buying an EBike Battery - Capacity (AH)

Summary: Bigger is Better

The capacity of a battery (think range or size of fuel tank) is normally given in Amp Hours (AH), typically the bigger the capacity of an ebike battery the more you pay. But before you spend a fortune on getting the biggest battery you can find it is worth considering how far you need to go.

Luckily for us somebody have developed an ebike range calculator for using to determine capacity required. Just fill in the boxes, and you will arrive at your required AH capacity. For me that was 15 AH.

This required capacity relates to a 48 volt system. If you did the same journey with a 24volt system you may require double the capacity.

I am not too hot with electronics so just use the calculator and you will soon realize what is going on!

Thorpy's Guide to Buying an EBike Battery - Voltage (V)

Summary: Must Match Existing if Replacing - Choose 48v if building from New

As mentioned above if you run a lower voltage you will require a higher capacity battery to travel the same distance, this is because a lower voltage ebike motor will use more amps, than a higher voltage motor to do the same amount of work.

A low voltage motor is probably OK in  flat areas where is does not have to work very hard, but if you require lots of power for hill climbing etc. the current flowing through a low voltage hub may damage the motor. The lower the voltage the higher the current needs to be to provide the same energy to the motor.

For example my 24v 500w motor draws 30A when climbing. The wires get warm, the motor is hot to touch. If you consider a vacuum cleaner runs on 13A or less, we can start to see that a high power motor at a low voltage is not very practical.

So if like me you wish to travel 20 miles over hilly terrain you will likely need a 15 AH battery if you are running a 48 volt system, but 30 AH if you are running a 24 volt system.

If you are building bike from scratch you can choose whichever voltage you think suits best (36v is the most widely used), 48v  for heavy going.

If you are replacing a battery you will have to stick to the same voltage, although some good quality motors can be run at higher voltages. But without getting too technical, just replace with a battery of the same voltage.

A final word. It does not do a battery any good to run it down to flat every time you use it. So buy a battery a little bigger then you need. For Sealed Lead Acid Batteries you should only use half of the marked capacity! For most lithium batteries 80% - 90% is OK. Yet another reason why lithium batteries are so much better for ebikes.

Thorpy's Guide to Buying an EBike Battery - Types of Battery (Chemistry)

Summary: For Reliability Choose LiFePo4

Most ebike use some type of lithium battery. Lithium batteries hold lots of power for their size. Although if you are on a very tight budget you might consider sealed lead acid batteries, but these are very heavy.

For proven track record a "LiFePo4" Lithium Battery will be your best bet, although there is now a growing number of  "NMC" Lithium Batteries coming on the scene. These "NMC" batteries are lighter although they are likely less reliable over longer time periods.

Thorpy's Guide to Buying an EBike Battery - Manufacturers (Brands)

Summary: For Value Choose Samsung for Reparability Choose Headway

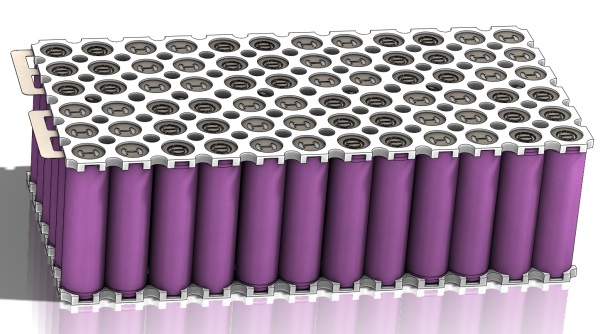
If you are buying an ebike battery choose known manufacturers. To be clear this is not for the battery itself, it is the "cells" within the battery.


As above; a battery is composed of many small cells, and you should choose a known manufacturer. For example you might find the battery described as 48v 10ah Samsung. If the battery does not include a known manufacturer in the description then it is probably made with cheap no name cells that may not last very long (although you might be lucky!). Look for:

  • Samsung
  • Sony
  • Panasonic
  • Headway
Most cells are 18650 type this number relates to the shape of the cell. We are used to describing cells as AA or AAA or even (gasp) LR6. 18650 fits in with these names. 

Thorpy's Guide to Buying an EBike Battery - Output (A)

Summary: Divide the motor wattage by the voltage and multiply by 2.5 for required.

You should check the battery's output is OK for your motor. We are looking for an Amps (e.g. 30A) figure here. A normal 24v 250w motor should draw about 10A, but in reality this could be as high as 15A. For a rule of thumb divide the wattage by the voltage and multiply by 2.5. Then you will never be disappointed. 

It is the continuous or 10min peak amperage you should be looking for. 

The output of a lithium battery is largely determined by the BMS (battery management system), most modern lithium batteries can put out massive currents (amps), so it is the BMS  (the small computer that controls the charging and discharging (output)) from the batteries that is the controlling factor here. 

Sealed lead acid batteries do not require BMS. 

Thorpy's Guide to Buying an EBike Battery - Where to Buy

Summary: Anywhere you like just make sure cells are branded. 

I have not included non branded cells in my search. If you are going to spend a lot of money on a battery then buy something good, that will last (hopefully).

BMS Battery - Sell some batteries made with branded cells, but others are not branded.

Green Bike Kit - Sell some good quality batteries (Headway - £300 for 48V 10AH plus shipping).

AliExpress - Search for branded cells only.  So this page shows a seller who has some samsung celled batteries for sale (£300 for 48V 20AH). Just be sure to read the description carefully.

Eclipse Bikes - Sell good quality batteries based on headway (£500 48v 15AH) & samsung (£300 for 11AH) cells.  The headway batteries they cells can be repaired and have cells replaced easily. Eclipse bike also offer a repair service.

Thorpy's Guide to Buying an EBike Battery - DIY or Bodge Up

Summary: Make Do and Mend for Savings and Satisfaction 

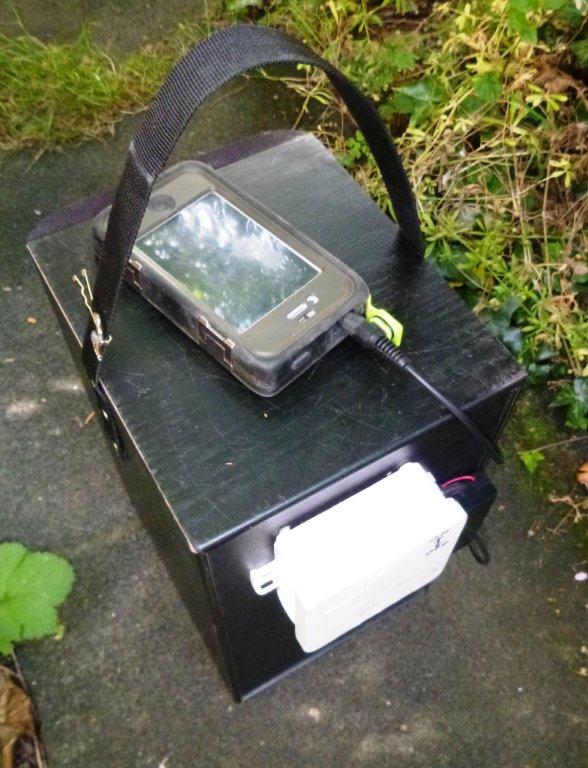
If you do not like spending money and have spare time do some research. You can build your own battery! Or you may be able to repair the one you have. For example a poor quality battery may be filled with 18650 cells which you may be able to replace. You could re-use the case or the BMS at the very least. 

If in my case you are swapping from a 24V to 48V system, can you use a step - up - transformer. To change 24v to 48v. Although you will need a transformer capable of handling high amperages, and a high amperage battery to account for step down in current. I may try this as this costs £18 insted of £300!


Thorpy's Guide to Buying an EBike Battery - Physical Size


Summary: Make sure it fits!


All bikes have limited space where a battery can be placed. For typical bike you are limited to a "bottle" type battery or one that fit on the rack at the rear of the bike.

Just be sure to check the battery you are getting for it size. Measure you bike to make sure it will fit, and that you have the correct mounting points.


Wednesday, 24 February 2016

Fastest CPU for XW6400 and XW8400

Fastest CPU for XW6400 and XW8400


Whilst on ebay a week or so ago I noticed that there were some used processors for sale that I might try in my XW8400.

This page might also be interesting if you have a Max Pro 2, as these use the same generation of processors as the XW8400, also the Dell Precision 490. However I do not own a Mac or  Dell!

In the quick specs document, the XW8400 and the XW6400 are shown as using:

At present I am using 5160 which is a 3 GHZ , 1333 FSB, 4 MB, 771 Processor

52XX (5200) and 54XX (5400) Series CPUs in XW8400 and XW6400


Since the release of my XW8400, HP have launched the XW8600, and its little sister XW6600.

These use the processor families (THEY DO NOT WORK):

Now the faster of these newer processors use a 1600FSB which I thought might cause problems, if I were to try it on my XW8400. But some of the newer processors use a 1333FSB. So I thought I would try one of those.

The cheapest I could find on ebay that would have improved performance on my machine was the X5260, which is a 3.33 GHZ , 1333 FSB, 6 MB, 771 Processor. I bought 2 for £5 each so throw away money really.

THEY DO NOT WORK. I tried both just to make sure and the machine will not start, I replaced the original processors and she booted. So that is a shame no upgrades for me. I would 99% assume therefore that all 5200 series processor will not work. And I would 95% assume that all 5400 processors will not work.

So what are the fastest Xeons for the XW8400 and XW6400?


So to conclude the fastest processors for the XW8400 and XW6400 are:
BUT BUT BUT What is this I see? HP mention a processor - Xeon 5170 at 3.33GHZ . . .  .

Well it is not listed on the Intel website so rather disappointingly this is either a typo, or a ghost CPU!

Thorpy's Recommendation

If you are undertaking very CPU intensive operations such as video rendering or such like, then it may be worth getting quad core processors. However, the XW8400 at least works very well with a 5160 processor. This is very noticeable when doing normal computer use (opening and closing apps etc.) A 5160 can be had cheaply on ebay as can a heat sink.

If you are thinking of installing one quad core, I would recommend installing 2 dual cores. This will not only be cheaper, but it will help cooling. You will spread the heat load over two heatsinks.

I have not tried the 5365 (quad 3.0ghz) processor, but I have tried the 2.66 ghz 5355. I found them to be noticable slower during open cloase working, and they run much hotter. In fact I think I burnt out a mother board on one of my xw8400's due to over heating*.

*Rebuilding 16GB outlook data base unattended, on a hot summers day with non-standard low noise CPU fan.. . . your choice. 


 Environmental Consultants Bristol

Thursday, 9 July 2015

Using a PC Cooling Fan for Ventilation - How To

Using a PC Cooling Fan for Ventilation - Intro


If you are wondering whether you can use a PC Cooling / Case Fan for Ventilation the the answer is YES.

In fact a PC Cooling Fan offer many advantages over the normal domestic offerings:

  • Quiter
  • 12v System
  • Easily Mounted

Using a PC Cooling Fan for Ventilation -  Kit List


So what do you need to set this up?

  • A 80mm or 120mm pc cooling fan.
  • A power source. 12V DC 1A adaptor.
  • Wood screws(40mm)
  • Jig Saw
  • Screwdriver
  • Sandpaper
Optional Extras
  • Wall timer
  •  Fan speed controller
Using a PC Cooling Fan for Ventilation - How To

A picture tells a thousand words:

PC Fan for Ventilation - Overview of setup.

PC Fan for Ventilation - Use a Molex to 3 Pin Connector to avoid cutting wires.

PC Fan for Ventilation - Check fan for voltage and amps required.


PC Fan for Ventilation - Add a second fan if you require more air.


PC Fan for Ventilation - Use a wall timer to automate the on and off times. 

Using a PC Cooling Fan for Ventilation - Handy Tips


  • After cutting the hole, sand the edges to make sure no bit come in to contact with fan blades.
  • If you are using a power full fan 0.4A for example buy a fan speed controller, as they can be noisey when running at full speed.
  • Arctic Cooling PWM fans can be connected in-line with no splicing required. 
  • Avoid cutting fan wires by buy a cheap molex to 3 pin adaptor.

Obviously this system could burn your house down if connected up incorrectly, and any cutting of wires will void any warranties. Do all of the above at your own risk. After all I have just written about what I am doing, it is your choice if you decide to do any of the above.

Passive House

Friday, 8 May 2015

Chainsaw Chain Keeps Moving at Idle

Chainsaw Chain Keeps Moving at Idle - Intro 


I have an 10 year old husqvarna chainsaw with a chain that keeps moving at idle, I used to apply the chain brake to stop the chain when not using the saw, but the problem has got steadily worse and now the clutch overheats so I had to try and fix it.

Trying to fix this chain moving at idle problem has lead me on a journey of discovery which I will now share with you in the hope it may help you fix the same sort of problem.

Chainsaw Chain Keeps Moving at Idle - 2 Causes


I may be wrong but there are 2 basic reasons why your chain might move at idle:

  1. A faulty clucth (or something else) is engaged and is causing the chain to spin.
  2. The clutch is OK but the saw is revving too high and so the clutch engages (as it should) at higher revs.

"Clutch" Based Reasons (1)


Chainsaw Chain Keeps Moving at Idle - FIX A - Faulty Clutch


The spring on the centrafugal clutch may have become weak over time, and now when the RPM is correct (sat around 2800 RPM), the clutch engaes and the the chain moves.

Either replace you clutch, clutch spring, or tighten the spring.

There could be lots of sawdust or wood chips stuck in the clutch, if so get rid of this.

Further reading.

Chainsaw Chain Keeps Moving at Idle - FIX B - Seized Sprocket Bearings


While you are inspecting the clutch springs it is worth taking a look at the sprocket bearings, they may have overheated and seized. The clutch drum (and sprocket) should rotate freely on the crankshaft. 

Further reading

"Rev" Based Reasons (2)

I am no expert on carburettors please read this guide before following any of the below suggestions.


Chainsaw Chain Keeps Moving at Idle - FIX C - Adjust Idle Speed

on the carburettor there are 3 screws a low jet screw, high jet screws and a "T" screw. This T screw is for setting the idle. Turn it out (anticlockwise) to lower the idle speed, until the chain stops spinning. If the saw stalls before the chain stops spinning or this does not lower the revs enough to stop the chain moving, then it is likely you will have to adjust the carburettor.  

Chainsaw Chain Keeps Moving at Idle - FIX D - Adjust Low Jet

Turn out the low jet screw, this will richen the mixture and make the chain speed slow down. I think that adjusting this screw affects the setting of the high jet. But if you are just adjusting a small amount, perhaps leave the high jet screw alone, if this is set over lean it can damage the engine. Make adjustments very small and take not of which way you are adjusting them, so you can put them back how they were is the adjustments do not improve things.

Chainsaw Chain Keeps Moving at Idle - FIX E - Your May have an Air Leak

If the saw is running at high revs with the idle screw out and the low mixture set over rich then it is likley you have an air leak.

Put simply the engine requires air and fuel to run, the mix is controlled by the carburettor. If extra air gets in from else where then this will cuase an over lean mixture and the saw to run at higher revs.

Air leaks can come from

  1. Seals - Port Seal, Impulse Seal, Cranks Seals
  2. Cracks - In Cylinder Block
  3. Loose Nuts - on carburettor mounting etc.
I had no special machinery so I improvised in the following manner.

You will need a bicycle inner tube, and a bicycle pump.

Cut some piece of inner tube to fit behind the carburettor and the carburettor mount. Fit these is place to seal the port.

Refit the spark plug.

Cut the valve from the inner tube together with a patch big enough to fit behind the exhaust port. As pictured below: fit behind the muffler and re-attach.


Very carefully now use a pump to very gently blow a littl e air in the the seal chamber. Ensure that the piston head is down low, or up high ( you need to try both up and down I think) and not blocking the ports.


Listen for air hissing out, with a wet hand you may be able to feel the air escaping from behind a seal. Spray the outside of the sealed area with lashings on bubbly liquid, this could be kids bubble bath, or washing up liquid.

The picture above shows some bubble coming out of the crank seal. The man cuase of the air leak on my saw was a completely trashed impulse seal. Pictured below.


Further viewing (video below).


Chainsaw Chain Keeps Moving at Idle - Conclusions

So I hope you can see from the above that there are many reasons why your saws chain may be moving at idle. And hopefully using the baove information you can fix your saw, and get back out in the woods.

Disclaimer:


I am not an expert and this is my first foray in to the world of small engines so please read this guide at your own risk. My saw is worth about £50 / $90, and worth nothing broken, so I had nothing to loose here. If your saw is worth a lot of money then please read up on the each fix before attempting it. Chainsaws are really really dangerous obviously, and despite trying to fix this saw I have in the mean time bought a new one, because I value my legs and other limbs, and want a saw that is safe to use because they are inherently dangerous anyway. Perhaps consider doing the same your self.

Chainsaw Community Google


Monday, 20 April 2015

Sturmey Archer Drum Brake Service

Sturmey Archer Drum Brake Service - Intro


After 3 years (3000 miles) of maintenance free braking my XL-FDD Drum Brake had developed a small squeak, this happened when applying the brake. It was not a typical brake squeal, more a little squeak when the cam pivot arm (see below pictures for names) was moved.

So reluctantly I decided to open the brake up and see what was going on inside. This procedure could apply to any of the following models:

  • XL-FDD - 90mm Front Drum Brake & Hub Dynamo Combo
  • X-FDD - 70mm Front Drum Brake & Hub Dynamo Combo
  • XL-FD - 90mm Front Drum Brake
  • X-FD - 70mm Front Drum Brake
  • XL-RD3 - 3 Speed Rear Hub with 90mm Drum Brake
  • XL-RD5 - 5 Speed Rear Hub with 90mm Drum Brake
And probably some other models.

Sturmey Archer Drum Brake Service - Open Up


First off I removed the Cam Lever Arm, which I would advise you to leave in place / attached. You will need to wiggle this later on to work in some grease.


The modern Sturmey Archer Drum Brakes have cartridge bearings, so for those of you that are used to bearing cones etc. the procedure is far more simple. Holding on to the "anchor arm" (see below) undo the nut, and remove it from the axle. The brake plate assembly should now slide off.


Sturmey Archer Drum Brake Service - Clean & Lube


In side you will see that the brake pads are firmly attached to the brake plate assembly, the pads do not need to be removed for cleaning, simply use an automotive brake cleaner which you can pick up from your local motor factors (uni part for example) for £4 a can.Whilst I would say it is OK to blast the shoes with cleaner, be careful not to get any on the bearings in the hub drum, instead spray some on a cloth and wipe around the inside of the drum.


Sturmey Archer Drum Brake Service - Lube


Next up we need to lube the cam that spreads the shoes (see below picture), you will need to wiggle the cam lever arm (first picture on page), so you can poke some grease in the the areas where it is needed. Try not to get any grease on the shoes.


Next apply a little light oil to the upper pivot, see below.


Sturmey Archer Drum Brake Service - Put Back Together


This is the reverse of taking apart! The only thing to watch out for on the hub dynamo models is that the power outlet is lined up to where it was before taking apart. This is a little tricky because as you tighten the nut on the brake side the power outlet will rotate on the other side, but after a few goes no doubt you will get it right.

Happy tinkering.

Environmental Permit Applications