Showing posts with label Speakers. Show all posts

Tuesday, 9 January 2018

Top 5 Class D Amplifier Boards

Top 5 Class D Amplifier Boards - Intro


This page title should also have "low cost" added. All of the below boards cost less than £8 / $10, so make for a very low cost project, just be aware you will need to power these boards, and for the louder options below this can cost 2 or 3 times the cost of the board itself.

The below descriptions are boards I have owned and tried. All chips (8403, 8610 etc.) will behave differently depending on the boards used. For example if a specification says 24V, but you board has 22v capacitors, then you will not be able to run the max voltage.

Also just because a board has more capacitors and knobs on it does not mean the chip will be louder or better. The best results I find come from the most simple boards.

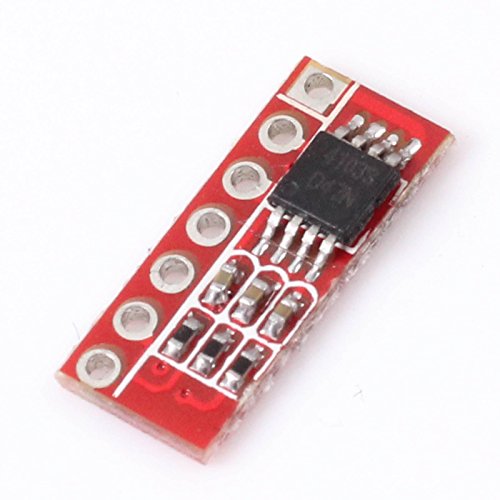
Top 5 Class D Amplifier Boards - 1 - PAM8403


Cost: £1 / $2
Voltage: 2.5V to 5V
Output: 2 x 3W

The top slot goes to the the PAM8403, this is the size of a postage stamp, and you can run it from a USB power supply, or 3 x AA batteries or a single lithium cell.

Its power is rated at 3W, but it is incredibly efficient, producing a room full of sound, when using 4ohm speakers.

My favorite class d amplifier, fiddly but fiesty!


If you have an old hi-fi speaker of any sort hanging around you could convert it to an active speaker, for perhaps just £2 / $4.

I have placed this board at number 1, because it is:


  • A versatile low cost amplifier
  • Very easy to power
  • Very very efficient
  • Good quality sound at all volumes
  • A lot of volume when considering low cost of board and power supply. 
Note: You can not run 1 speaker from this amplifier, both of the outputs have to be used to avoid damage to the chip. I have run a tweeter from left and woofer from right to get around this which is OK.

Top 5 Class D Amplifier Boards - 2 - PAM8610


Cost: £2 / $4
Voltage: 8V to 15V
Output: 2 x 15W


Second place, but only just. 

The PAM8610 is the logical step up from the PAM8403, it requires a higher voltage to work, and the low volume sound quality is not overly good, but it produces a very high volume for such a small amplifier. Get the basic board if you are buying with no heatsink or volume control, you do not need one. 


These is s light deterioration in sound quality at low volumes which some might find annoying. This can be well powered from 8 x AA batteries, or a cheap 12V wall socket transformer.  If you are running this amplifier from a SLA or Car Battery be a bit careful, because these sometime creep over 15V with some chargers. 


Top 5 Class D Amplifier Boards - 3 - TPA3116 


Cost: £5 / $10
Voltage: 8V to 24V
Output: 2 x 50W (Official) 2 x 15W (Real World)


This amplifier is comparable in output to the PAM8610, the sound is a lot cleaner to. But this is offset by the difficultly in proving 24V to power it adequately, it will work from 8V but you will have very low power levels until you reach 18V upwards.

I tried a complex 3 channel board, perhaps give a simple one a go.


That being said this is a versatile amplifier that will run on a very wide voltage range. The sound is crisp and clear at all volume levels, although high volume sound will be distorted if you are using an under powered supply. 

I used a 3 channel variant of this board which is so say 50 + 50 +100W, but is no where near this loud. Perhaps the board which uses NE5532 pre amplifiers. And the gain is fairly low.

Top 5 Class D Amplifier Boards - 4 - TDA2030

Cost: £3 / $6
Voltage: 8V to 16V - Will go higher on some boards. 
Output: 2 x 50W (Official) 2 x 15W (Real World)

This is actually a AB class amplifier, which is fairly inefficient. However it is small and cheap and reasonably easy to power. The sound is far richer than any of the above amplifiers, with a warm sound many will fine pleasant. 

It is not great for running from AA batteries but will run well from an SLA battery. It cannot be run from AA batteries as the power requirement is to high. 


Top 5 Class D Amplifier Boards - 5 - OEP3W or XTP8871

Cost: £1 / $2
Voltage: 2.5V to 5V 
Output: 3W Mono / 5 W Mono

I couldn't quite decide between these two they are both excellent boards that they can be powered from a USB port, requiring only 1A of power. Mono is easily achieved my mash together the positive and negative input wire. You then one have to find one speaker to use these amps, which lowers the costs still further. 


Environmental Permit Applications

Desktop Study

TPA3116 Amplifier - Power Supply

TPA3116 Amplifier - Power Supply - Intro


I am not an electrical engineer. Perhaps this is why I have tried this amplifier with 5 different power supply options. Including 12V, 15V, 20V, 24V  all have worked to some extent. Which shows this amp although needing a hefty power supply to produce loud music will, produce varying volumes from all different types of supply provided they are within spec voltages of 6V to 24V.

System: This is based on the 2 chip 2.1 board with NE5335 pre-amps. My input source was an Iphone 6, connected via a good old fashioned aux cable, via the 3.5mm headphone socket.

TPA3116 Amplifier - Power Supply - 12V 2A Wall Socket Power Supply

This worked OK, but the volume was very low. The sound was perfectly clean, noy problems really but very underwhelming volume.

12V 2A - Cheap and Works to an Extent

TPA3116 Amplifier - Power Supply - 12V SLA


I have tried this amplifier on 2 types of lithium batty which are design to replace SLAs, the shido LTX9-BS and the EV Power 7ah 12v LiFePo4 Pack.

The Shido LTX9-BS is the closest match to a true SLA as it gives out many many amps peak current. Powered by this SLA equivalent the TPA3116 gives out clean rich sound at a fairly low volume. Perfectly adequate for a lounge listening, or for speaker computers for example, but certainly not party loud.


SLA or Alternative OK for Low Volume


TPA3116 Amplifier - Power Supply - 12V to 24V Transformer from SLA


I have also tried a "Fulree" Step-Up converter, rated at 3A this gives more gain for lower input volume, but I suspect the 3A max current is not high enough to support the TPA3116 at high volumes.

I have tried this 12V - 24V Step-Up converter powered from the above Shido battery and also powered from a 20V 90W (4.5A) IBM Thinkpad Power Supply.

The TPA3116 will cut out (I Think) if it is not getting enough current. I have arrived at this conclusion because whilst using the 12V - 24V Step-Up converter, the cut out occured at a lower volume when running from 12V than it did at 20V.

The 12V - 24V Step-Up converter supplies more current if it has to make up for smaller differences in voltage, so a lower volume cut out when supplying less amps would suggest a current cut out are caused by low current. The step up converter does com,e in a 10A variant which would be a better choice.

10A Variant preferable to 3A Version

TPA3116 Amplifier - Power Supply - 20V 4.5A Laptop Power Brick


At 20V this amplifier really starts to shine. The input source (Iphone) can be turned up to full volume with very little distortion. You also begin to feel the bass rather then just hear it. The sound is clean and crisp, and there is little or no hiss.

The good news about this power supply is that you probably already have one! Most laptop bricks run 19V or 20V, and although some may only kick out 2A this will be fine for a board with a single TPA3116 chip.

If you do not have one then I would suggest search for a "Thinkpad T60" power adaptor, they are 20V 4.5A and sell for £6 / $10 including shipping.

Excellent Sound - Feel the Bass - Excellent Value

TPA3116 Amplifier - Power Supply - 24V 6A Power Brick


I had to max this thing out, so I went for the 24V 6A "Minger" power brick that is available on Ebay and Amazon. After all I had tried nearly every other power source! So why not one more to make a good blog post.

24V power brick are quite expensive compared to 20V one, I had to pay £16 / $25 for this supply.


For Maximum Power and Higher Low Input Gain. 
Some Class D Amplifier Builds:

TPA3116 2.1 Speaker Build
PAM8610 Amplifier Review & Build
Make a Portable Speaker with PAM8403 Amplifier

ESDM Report

Tuesday, 2 January 2018

SPL10M.1 Review & Observations

SPL10M.1 Review & Observations - Intro


The cheapest 10" driver on ebay lead me to the SPL10M.1, this is a large speaker and is certainly heavy but is not a sub woofer. It is just a very large mid-bass driver. It is very well built, I paid under £20 for this peaker, and it is excellent value. But it has a weird spec!


I am not sure why it is so large, but for a low power application as I intend using a TP3116D2 amplifier I assumed it would be OK.


SPL10M.1 Review & Observations - Out of the Box


First things is that it is heavy. Second thing is that is built OK. The spring terminals have a reasonably high quality feel, and the materials look well finished. The cone is paper, rather then fancy new fangled material, but this is fine as I have used some very good speakers that have paper cones in the past. The stainless steel thing in middle of the speaker (phase plug?) is a high quality feature, at least aesthetically.


The box itself is a bit disappointing with little protection offered to the speaker. However at the price I bought this I doubt they wanted to spend extra ££ on wrapping!

SPL10M.1 Review & Observations - Performance

I have powered this up to around 50W with low frequency sound (it is not design for this) but performs well. I will attempt to describe the sound, but I am pleased with the purchase.


Environmental Consultants London


Environmental Permit Applications

Tuesday, 5 December 2017

Sony SRS-XB3 Portable Speaker Review

Sony SRS-XB3 Portable Speaker Review - Intro


The Sony SRS-XB3 is a smallish portable bluetooth speaker which has been superseded by the SRS-XB30. I went for the SRS-XB3 because it does not have all of the gimmicks that the SRS-XB30 has. If you want flashing lights and "demo modes" and all of the that annoying faff that gets in the way of listening to music then go for the XB30.

Understated - Satsuma for Scale


Sony SRS-XB3 Portable Speaker Review - Size


The  SRS-XB3 is about 20cm long and 8cm tall. Approximately the size of a battenberg cake. Or three rubix cubes in a row. It can be stood on end to fit in the narrow space on a book shelf or laid longways.

Sensible Size - Fits in Bag or Glove Box


Sony SRS-XB3 Portable Speaker Review - Battery Life


The battery lasts a long time. Specs say about 8 hours, so for me it will go over a week between charges. Of course as with all lithium batteries it is best to keep the battery topped up. Discharging the battery a lot will shorten its lifespan.

I have not used the speaker for charging USB devices, but this will shorten battery life. It is however a handy feature.


Charging, USB Port and Line In - Open Rear Flap


Sony SRS-XB3 Portable Speaker Review - Connectivity


Music via bluetooth or via 3.5mm auxiliary port. The bluetooth is quick to connect and the connection is steady when used within the same room. The aux port takes a standard 3.5mm headphone jack. So you will need a male to male connector lead to use this, which is not supplied, but can be had for £2 / $4 on ebay.

The SRS-XB3 remembers which device it is paired with after it has been switched back on. This is handy as you do not have to re-pair the speaker to the audio source (such as phone). However, if you are switching to another phone or player then you just hold down the pairing button on the top of the unit until you hear a beep, and then connect . pair through the settings on you phone / player.

Clearly Labelled Button - Very Easy Setup


Sony SRS-XB3 Portable Speaker Review - Sound


The most important bit. The speaker is small, but the tone is very rich. This richness can be enhanced by turning on the "extra bass" feature, which I seldom switch off! The rich bass is very noticeable at low to moderate volumes, however when using the Sony SRS-XB3 at higher volumes the bass is reduced, with treble and midrange becoming more predominant.

The sound is produced by a two small speakers and 2 passive radiators. These are wobbly bits of rubber that wobble in and out in time with the speakers and act as extra speakers. One of these passive radiators is front facing the other rear facing. This is good, as you can place you Sony SRS-XB3 in the corner of room perhaps 30cm for a wall, and the rear facing passive radiator causes reverberation from the walls = extra extra bass!

When listening to EDM I find it helps to place the speaker in the corner. You get a free power boost this way.

Specs - 15V x 2.5A = 30W approx RMS Music Power


Sony SRS-XB3 Portable Speaker Review - Conclusion


This is a good little speaker. The depth of bass for its size is most impressive, although it lacks very deep bass you may get with larger speaker systems. For day to day listening and radio listening it is perfectly adequate, and if you wanted to crank up the volume at the weekends then it can be quite loud.

Interestingly this speaker can be linked with a 2nd Sony SRS-XB3 Portable Speaker, to form a stereo listening experience, which would double the volume and create a more dynamic sound


Environmental Permit Applications

Monday, 28 August 2017

Thorpy's Non-Technical Speaker Crossover Guide

Thorpy's Non-Technical Speaker Crossover Guide


Intro


There are plenty of guides around on the web showing how to build speaker crossovers.

However, I found most be a bit mathematical. You will need maths if you a building the perfect set of speakers, but for a functional set, you can use these rough instructions. They worked for me.

Crossovers are normally hidden inside a set of speakers and so unless you are building your own boom box, or set of speakers, you may never have seen one before.

I have taken some of the more simple advice on the web and dumbed it down still further, for those who want to see some pictures, and just have a go.

I have no clue how any of this works. But I have built a boom box, with the below components, some homemade / DIY, and it works. So I would urge you to have a go too.

What does a Crossover do?


If you look at most speakers they have two drivers, a tweeter for treble  (high pitch sound) and a larger driver for mid range and bass (low pitch sound).

What does a cross over do? Well it filters the sound and delivers high frequency sound only to the tweeter, and low frequency sound to the large driver.

Do you need a Crossover?


Sometimes no. Sometimes yes. Most speakers have some form of crossover. But how can you tell if you need one:

Example 1 - A crackly / distorted / snicky sounding tweeter may require a filter to get rid of the low pitch sound, that it is not designed to handle. In this case you would want to filter out low pitch sound, with a "high pass filter", which can be done with a capacitor (see below).

Example 2 - A harsh sounding mid / bass driver that is getting too much treble. In this case you would need to filter out the high pitch sound. This can be done with a "low pass filter", this is done with an induction loop.

What do you need to build a cross over?

Here is a picture of my setup. (I am sorry to say that the capacitor in this picture is covered with glue, so it is a little hard to see. But it is there! Click on the image to make it bigger)

Ugly but Functional


Ingredients - You will need:


  • Soldering Iron & Solder
  • Insulated Copper Wire 2 or 3 Meters
  • Bi-Polar Capacitor 40V +
  • Sticky Tape
  • Glue
  • Chunky Steel or Iron "Core for Inductor"*

*I used the spindle from a industrial motor, but you could use a bit of scaffold pipe, or a big bolt or a piece of broken round file. It has to be iron or steel.

Install a High Pass Filter (also called a "Bass Blocker")


A high pass filter is very easy to install, you will need a bi-polar capacitor.

Polarised or Bi-Polar


Now as a general rule you should choose a capacitor with a voltage above 40V, but the higher voltages will also work, although they offer no advantage. The "uf" can be anything you like, and will probably work OK. Search here.

Just solder the bi-polar capacitor between the positive amplifier output and the the positive terminal of the tweeter. The the tweeter should be "fed" power through the capacitor.

Top Tip: Do not look directly at the capacitor when you power up you system. It may explode if you have chosen the wrong voltage or type (polarised or bi-polar). If you look the other way the bits won't go in your eyes.

Install a Low Pass Filter (also called a "Treble Blocker)


To make your low pass filter (induction coil) take around 2 to 3 meters of door bell wire, or other single cored insulated wire, and wrap is around your chunky steel or iron core. Leave enough spare wire poking out so you have enough to solder it to where it needs to go.

An Induction Coil - Very Techncial

Power needs to be fed to you bass speaker through this coil. So you wire one end to the positive supply from the amplifier and the other to the positive terminal of the speaker. (Scroll back up to the labeled picture to see how)

Conclusion

As mentioned this will not get you a top notch speaker, but it will make a horrible sounding speaker sound OK. 

By example, before installing these DIY crossover coils, I had to have the equaliser on my iphone on bass booster, and the sound was still too harsh.

After installing I can switch the EQ off, and they sound well balanced, I used an induction coil (low pass filter) taken from a professionally made speaker for the left hand side, and my DIY induction coil (low pass filter) on the right hand side. I cannot tell any difference by listening between the speakers. So the homemade one is working it would seem. 

For Reference - This is a professional made induction coil. Note PAM8610 amplifier bottom Right.

For reference I am using a PAM8610 to run this portable speaker, from 7 x AA batteries. The speakers were taken from some low quality active speakers. Also I should point out that you can get a pretty good bluetooth speaker for £30 / $50. So do not spend too much money on this unless you are doing it for fun!

Inside my DIY Portable Speaker


Environmental Permitting

Environmental Permit Applications