Wednesday, 26 January 2022

Zombieville USA 2 Review

Uncommonly Good 

This is the first video game review I have ever written. Such is has been my enjoyment of this simple, yet perfectly crafted game I felt compelled to write something about it. 

The tone of the game is comedic, and gory. A bit like Shaun of the Dead but a video game, and in cartoon form. What's not to like!

One of my favorite features of this game is the lack of in-app purchases. You pay for the game (costs less than a single weapons upgrade in other games - £=$0.99) and that is it, everything else is provided free of charge. 

This has left the developer free to concentrate on the game play, rather then rinsing every last cent out of the gamer, and as a result the game is 99% perfect. It is such a well balanced game I marvel at its conception. 

It doesn't go on forever. But once upon a time, that was the norm for games. You could "complete" them. 

Set Up

At the start of Zombieville USA 2 you begin with a selection of weapons that are fine for use straight away in early levels. You earn quite a lot of game money for every level you complete, or attempt. This makes the game quite relaxed, if you get you brain eaten half way through a level, you still get paid. You can then use the money earnt to buy new weapons, upgrade weapons, or buy and upgrade abilities. 

You can change you character (panda shown here), weapons, and abilities every time you start a level. 

Your Character, and Game Start Weapons

Characters 

Although the characters (skins I suppose) do not infer any different abilities there are quite a few to choose from. They are not customisable. But there are some fun options. 

Plenty of Character Sprites to CHoose From!

You can choose from Hazmat Suit, Cheerleader, SWAT Guy, Panda Bears . . .  there are quite a few, and again the fun cartoon theme adds a certain warmth to this Zombieville USA 2 which many will find appealing. 

If you choose a new character, they will also have their own unique weapons. This is quite fun, as you can build a weapons set around certain character. 

Weapons

As well as the more standard offerings of pistols & shotguns there are some more advanced offerings. However, the heavy weapons such as Minigun, and Flamethrower slow down the movement of the character during game play. Which can make them annoying to use. 

You can lessen this slow movement with upgrades, and abilities, although I haven't tried that. 

Weapons for Sale

My personal favorite weapons & abilities set is shown below. The Uzi when fully upgraded turns to twin Uzis which is a fin twist. Its just a shame some of the more powerful weapons come with that movement penalty.  

My Favorite Set

Weapons also include hand to hand items such as baseball bats and chainsaws, and items such as grenades and first aid kits.  

Abilities

As well as weapons, you can buy abilities. These are overall abilities that apply to all weapons of a certain type (such as "Full Auto"), or give you extra health (like "Body Armour").

Abilities - Plenty to Choose From

Top picks for me would be "Full Auto" (improves automatic weapons), "Quartermaster" (You can hold more ammo), and "Body Armour" (increases Max health). "Radioactive" is also quite good (recharges health), and "Speed" which can be used to overcome those heavy weapon movement penalties. 

Game Play 

So with your first set of weapons, or you carefully selected set of upgraded death bringers, you can start to have a crack at the zombies. There are 10 levels to choose from, with each subsequent level the "infection level raises". 

At first the levels past level 4 seams overwhelming, there are too many zombies to fend off. And you can make little headway. However, with a few upgrades (weapons & abilities) you soon start to make headway. 

Early Levels have a Few Zombies

The game controls are very simple. A movement pad, and three buttons for weapons or other items. Zombie burst out of the ground a various points, and you have to fend them off. You can also run away, if there is space to do so. 

Later Levels Have Many More

 However, by the time you get to higher levels such as 8 or 9 running away become very difficult as there are zombies everywhere. However, you will need to keep moving, as you need to pick up the bonus items received from killing zombies or shooting flower pots, road cones, and rubbish bins. Most important of these bonuses is ammo. There are small boxes, quite frequently, and larger caches less frequently. 

At the end of each level (whether completed or not) you will get a score table that shows you you score, kills earning etc. 

How did You Do?

Conclusions 

Zombieville USA 2 is one of the best games I have played in years. The last game I was hooked on before this was Pixel Gun 3D. But unlike Pixel Gun 3D I do not play this game impulsively. 

The thought that has gone in the balance of the game is impressive. For example, the power of the weapons vs the quantity of Zombies.  The amount of damage zombies do to you. And above all the whole experience feels unpressurized owing to lack of monetisation, and that if a level is proving tricky you can replay a earlier level (which is different every time) and "save up" game money to improve weapons. 

Its pretty much perfect. And of $0.99 practically free. Well done to the developers, and thanks!

Flood Risk Reports

Desktop Study

Monday, 24 January 2022

Top 5 Paid Shooting Games - iPhone & iPad

Top 5 Paid Shooting Games - iPhone & iPad

I am old fashioned. I like to buy things upfront.  

Why Paid Games

Take Pixel Gun 3D for example. Pixel Gun 3D is stuffed with in-app purchase options. I download this every Christmas, and play multiplayer with my kids. It is a great game, I love that it isn't too gory. And that the weapons are fun and very varietous. 


Pixel Gun 3D is a great game, but when playing I am never sure whether I am winning because I am good at the game. Or because my equipment is better than other people. I also find that sometimes I am playing just to win coins. 

So perhaps owing to my addictive personality I find I play these in-app purchase driven "free" games impulsive and as such with less enjoyment. 

So without further ado, I present my top 5 list of paid for first person shooter games, on IOS: iPad and iPhone. 

1 - Doom 2 - ID Games - $4.99

For the price of a weapons expansion pack in most "free" apps. You can get Doom 2. This is a raycasting type first person shooter. Its one annoyance is that you cannot look up and down. 

The game has a limited but characterful set of weapons, but where is really stands out is the level architecture. You really have to navigate through the levels. 


It is basic yes. And by today's standards the sprites are a blocky. And there are only 10 different weapons in total. But I find I can pick this game up, play a level in 5 to 10 minutes, and enjoy the experience. So I would give it a go. for sure!

2 - Zombieville USA 2 - $0.99

This game must be the best value game of all time. Although quite gory, the cartoon like graphics give it a certain child like warmth. You cab change characters during the game, and equip each character with different weapons sets.  You can purchase different guns and other weapons using money earnt in the game. The money earnt during each session is generous, so you can soon get a full set of weapons. 


As well as weapons to but, you can also upgrade each weapon. And in addition there are "skill sets" that can be purchased, such as "Full Auto" that improves performance of all automatic weapons or, "Body Armour" which increases health. 

In game play, you can carry 3 weapons, a nice touch is that you can use each weapon with its own button. Which make switching very easy. 

This is one of the best games I have played in ages. Twin Uzis. That's all I'm going to say. 

3 - Space Marshals - $4.99

Will update this when I have played some more. 

4 - EPOCH.2 - $0.99

This game, is quite novel. Whilst most of the games in this list use control layout not dissimilar to hand held consoles (virtual buttons), the system by which you control your robot in this game is I think made for touch screen, with swiping, and tapping on targets. 


This game is based on the Unreal Engine. Which I have also enjoyed in the past as even on shoddy hardware the movement is always nice and smooth.

Whilst I enjoyed this unusual control system, it does distract from the connection that you feel to your character. You can only go where the game let you go. Can I jump over a gap and tackle enemy face to face. . . no I must wait until I am allowed to.

The graphics are very atmospheric, and there are some cool effects that you can use, such as a slow motion effect, where the game speed slows right down, yet you character remains at normal speed. This way you can engage with some of the more ferocious enemies without getting hit. 

For $0.99 this is a bargain.

5 - Hitman Sniper - $0.99

This game I did not find such good fun. And really my including it here shows how limited the choice of paid for apps has become. This game also includes in-app purchases. 


The game is quite atmospheric, and I enjoyed this aspect of it. But the very nature of creeping around shooting people in the vital organs and brains, does not fill me with any kind of positive thoughts. I like a bit of escapism in my gaming and this did not provide it. 

Environmental Consultants London

Flood Risk Assessment London

Preliminary Ecological Appraisal 


Friday, 7 January 2022

Thorpy's Guide to Lime Rendering for Beginners

Introduction

Most houses have very smooth interior wall surfaces provided by gypsum plaster. This typical pink plaster is a relatively high skill material to work with despite being in an out of building trade for 30 years, I prefer to leave it to specialists. 

Lime render or lime plaster is a sand and lime mix that is easy to work with, and although it does not give the perfectly smooth finish given by gypsum plaster, it has a charm of its own and I like using it, and the finish it provides.  

Lime Rendered Walls with a Slatted Ceiling

For an earthy build, with the right aesthetics lime render can fit very well, but it would likely look a bit odd in a "normal" house. In the above picture I have used a slatted ceiling with lime rendered walls. The two complement themselves rather well. Wooden window frames would have been a nice touch, but they were too expensive.

Fitness. I can cycle about 20 miles in one go over very hilly countryside.  Averaging around 10 miles an hour. . . .. . .  1 day of lime rendering (about 10m2) on my own (mixing, troweling, sponging) and I am dead to the world the next day. So it is best done as a shared job. It can also be a long job. . . . 

Mixing

. . . . .  based on an 0800 - 1700 day your last mix of the day should be about lunch time. Using the method described on this post, you will need 3 or 4 hours setting time before you can finish the work. A load mixed in the mid afternoon might be ready to sponge at 8pm - 9pm. For me that was after dinner! 

Mixing lime render is quite easy. Lime (Natural Hydraulic Lime) and sand (the sand will affect colour!) roughly 3 parts sand to 1 part lime. 

Be very careful not to get any lime in your eye. The worst thing you can get in your eye is a strong alkaline. And guess what; lime is a strong alkaline. If you do get some in I have found that sticking you head in a bucket of water and washing out eye, very very well works to stop any damage. Do not mess about walking to first aid post to get eye wash, or rubbing your eye with a wet towel. Wash out your eye very quickly and well, with tons of water. If irritation persists after washing (it never has for me) then go see a Doctor. 

It is worth keeping a large bucket of water handy for eye washing. My mother-in-law got some lime putty in her eye once, didn't wash it out very well, and the results were quite shocking. The white of her eye ball went bright red and lumpy. Its vicious stuff.  

The below video shows how to mix lime render. It is a warts and all video. The mixing does not have to be 100% precise. 

Put 0.5 bucket of water in a cement mixer. If you don't have one you can hire one. The only thing that goes in the mixer whilst it is switched on is the sand and lime. Do not put your hand inside, do not put your shovel inside. 

Next put in 3 shovels of sand, and a shovel of lime. The end result that you need is something resembling butter creme. It should be soft, and easy to work, but it should keep it shape quite well, when pushed around with a trowel. 

Put in more water or more sand and lime (keeping the ratio 3:1) until it looks right. 

When you are happy with the result tip the lime render in to a wheel barrow, and then scoop some out in to buckets. You then carry these buckets inside.

Tip the buckets on to a "spot" this is any old bit of flat wood. Left over floor boards or a 2ft square of board of any type is ideal. If you can put this "spot" on a table. . . or a stack of blocks it will save your back.

Putting it on the Wall

You will need a hawk and a plasterers trowel as a minimum to put the lime render on the wall. Lime render can be applied as one coat to a concrete block wall. If you are doing partition (wood or steel frame walls) then things might be more complicated. See partition walls for advice. 

Hold the hawk just below the edge of the "spot" and scrape some of the render on to it using the plasterers trowel. It is good to wear rubber gloves. 

If your hawk is aluminium you may notice that it starts to fizz after a while, as the lime render (strong alkaline) eats away at the metal. This serves as a handy reminder not to get any in your eye!


Most people recommend starting at the top of the wall. But to start with just slop it ion the wall, and see how you get on. Perhaps start in a less visible location, so that your first bit of render (likely the lumpiest) will be principally out of view.

Put 4 or 5 hawks worth of lime render on the wall. You will start to see where the lumps are. You can then go back over it. Scraping of high points and filling in low points. You can keep doing this for ages with lime render. Pushing scraping and adjusting until you are happy with the result. This is the beauty of lime render, its workability. 

Once you have it quite flat, then leave it for a few hours until it is firm to the touch. You will then give it a sponge. 

Sponge O'Clock

When you can push the lime render and it only leaves a very fine finger print, and requires a little effort to do so then it is ready to sponge. 

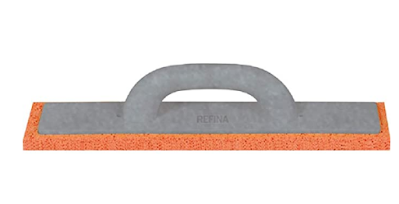
You can use a sponge (decorators sponge) or a sponge float. The latter requires a little more skill, but gives a flatter wall. A sponge float also requires quite a lot of strength to use. 

Refina Sponge Float

I use one of these and a decorators sponge together. You can use the sponge float first to flatten the render and then buff up and smooth little hollows so they blend in using the decorators sponge. Once you have finished sponging simply walk away and leave the render to cure, this will take a few weeks. 

Trust your own judgement, you know what you want you wall to look like. Stand back now and again to look at what you are doing. 

Undo

If at the end of the day you are unhappy with the result, take a shovel and scrape all of the lime render off of the wall. Have another go in a few days time. I did this once. It was a bit depressing, but it good to know you can just start again at any point. 

Partition Walls 

Lime render sticks very nicely to concrete block walls. But things are a little trickier when using stud partitioning. Initially I tried making "lathes" out of thin ply wood. But they were too bendy and it did not work very well. 

Secondly I tried thin plywood with lots and lots of holes drilled in it. This was OK. I think the problem was that I was trying to do everything in one coat (which is easy on concrete blocks), but not so easy on any type of plywood. 


I would recommend using thin plywood, with holes drilled in it . .  ort thin plywood with a sheet of EML over the top. I would then put a thin coat of lime render over this using a notch trowel. Leave it for a few weeks, and then put the top coat on. I did n't have time to do it this way, as I had to get back to my real job. 

Corners

Typically one would use angle bead for corners when gypsum plastering. But lime render is so workable you can use a corner towel if you like. It is hard to get the corners dead straights, but they will look reasonably pleasing when down. 


I used a rounded corner trowel for all corners around windows and else where, and found by the end I found it quite easy. 

Colours

There is nothing stopping you from lime washing the rendered wall when it is finshed. You can get natural pigments and mix them with lime and water to make a creamy lime wash, which you then paint on to walls. 

You can use a roller if you like, but the result will be different to a brush. This is very messy and the pigments will stain your floor boards so put down some sheet. 

Keep that bucket of water handy for eye washing. 

In my honest opinion the lime render is best left naked. It almost feels like you are sitting in nature. I used a yellow building sand which results in a beige colour when mixed with white lime. But you can change the lime colour, and the sand colour to give different affects!

Cost

If you can do the work yourself you can expect a very cost effective result. Materials and tools to render 80 m2 of walls cost me around £300. A plaster might charge £300 to plaster 1 small room. 


Preliminary Ecological Appraisal 

Flood Risk Assessment London