
Introduction
Most houses have very smooth interior wall surfaces provided by gypsum plaster. This typical pink plaster is a relatively high skill material to work with despite being in an out of building trade for 30 years, I prefer to leave it to specialists.
Lime render or lime plaster is a sand and lime mix that is easy to work with, and although it does not give the perfectly smooth finish given by gypsum plaster, it has a charm of its own and I like using it, and the finish it provides.
 |
| Lime Rendered Walls with a Slatted Ceiling |
For an earthy build, with the right aesthetics lime render can fit very well, but it would likely look a bit odd in a "normal" house. In the above picture I have used a slatted ceiling with lime rendered walls. The two complement themselves rather well. Wooden window frames would have been a nice touch, but they were too expensive.
Fitness. I can cycle about 20 miles in one go over very hilly countryside. Averaging around 10 miles an hour. . . .. . . 1 day of lime rendering (about 10m2) on my own (mixing, troweling, sponging) and I am dead to the world the next day. So it is best done as a shared job. It can also be a long job. . . .
Mixing
Mixing lime render is quite easy. Lime (Natural Hydraulic Lime) and sand (the sand will affect colour!) roughly 3 parts sand to 1 part lime.
Be very careful not to get any lime in your eye. The worst thing you can get in your eye is a strong alkaline. And guess what; lime is a strong alkaline. If you do get some in I have found that sticking you head in a bucket of water and washing out eye, very very well works to stop any damage. Do not mess about walking to first aid post to get eye wash, or rubbing your eye with a wet towel. Wash out your eye very quickly and well, with tons of water. If irritation persists after washing (it never has for me) then go see a Doctor.
It is worth keeping a large bucket of water handy for eye washing. My mother-in-law got some lime putty in her eye once, didn't wash it out very well, and the results were quite shocking. The white of her eye ball went bright red and lumpy. Its vicious stuff.
The below video shows how to mix lime render. It is a warts and all video. The mixing does not have to be 100% precise.
Put 0.5 bucket of water in a cement mixer. If you don't have one you can hire one. The only thing that goes in the mixer whilst it is switched on is the sand and lime. Do not put your hand inside, do not put your shovel inside.
Next put in 3 shovels of sand, and a shovel of lime. The end result that you need is something resembling butter creme. It should be soft, and easy to work, but it should keep it shape quite well, when pushed around with a trowel.
Put in more water or more sand and lime (keeping the ratio 3:1) until it looks right.
When you are happy with the result tip the lime render in to a wheel barrow, and then scoop some out in to buckets. You then carry these buckets inside.
Tip the buckets on to a "spot" this is any old bit of flat wood. Left over floor boards or a 2ft square of board of any type is ideal. If you can put this "spot" on a table. . . or a stack of blocks it will save your back.
Putting it on the Wall
You will need a hawk and a plasterers trowel as a minimum to put the lime render on the wall. Lime render can be applied as one coat to a concrete block wall. If you are doing partition (wood or steel frame walls) then things might be more complicated. See partition walls for advice.
Hold the hawk just below the edge of the "spot" and scrape some of the render on to it using the plasterers trowel. It is good to wear rubber gloves.
If your hawk is aluminium you may notice that it starts to fizz after a while, as the lime render (strong alkaline) eats away at the metal. This serves as a handy reminder not to get any in your eye!
Most people recommend starting at the top of the wall. But to start with just slop it ion the wall, and see how you get on. Perhaps start in a less visible location, so that your first bit of render (likely the lumpiest) will be principally out of view.
Put 4 or 5 hawks worth of lime render on the wall. You will start to see where the lumps are. You can then go back over it. Scraping of high points and filling in low points. You can keep doing this for ages with lime render. Pushing scraping and adjusting until you are happy with the result. This is the beauty of lime render, its workability.
Once you have it quite flat, then leave it for a few hours until it is firm to the touch. You will then give it a sponge.
Sponge O'Clock
When you can push the lime render and it only leaves a very fine finger print, and requires a little effort to do so then it is ready to sponge.
You can use a sponge (decorators sponge) or a sponge float. The latter requires a little more skill, but gives a flatter wall. A sponge float also requires quite a lot of strength to use.
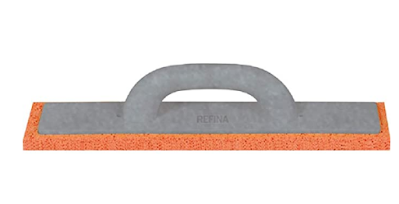 |
| Refina Sponge Float |
I use one of these and a decorators sponge together. You can use the sponge float first to flatten the render and then buff up and smooth little hollows so they blend in using the decorators sponge. Once you have finished sponging simply walk away and leave the render to cure, this will take a few weeks.
Trust your own judgement, you know what you want you wall to look like. Stand back now and again to look at what you are doing.
Undo
If at the end of the day you are unhappy with the result, take a shovel and scrape all of the lime render off of the wall. Have another go in a few days time. I did this once. It was a bit depressing, but it good to know you can just start again at any point.
Partition Walls
Corners
Colours
Cost
Preliminary Ecological Appraisal
Flood Risk Assessment London
No comments:
Post a Comment
If you leave question they will get answered! But no spam please I will delete it. :-(