Thursday, 17 July 2014

Adjusting Bearings in Cheap Pedals

Adjusting Bearings in Cheap Pedals - Intro


My right hand pedal was feeling a little loose so I thought I'd try to adjust the bearings. The pedals cost about £5 ($8) about 1 year ago they are resin body wellgo pedals, and I have the sneaky suspicion they were never intended to be serviced!

Adjusting Bearings in Cheap Pedals - Cone Problems


Taking the pedals apart was easy, no problem. It was the putting back together that caused problems. When you tighten the lock nut (the outer most nut) you also as a side effect tighten the cone. If you are using a socket to tighten the lock nut you will not have room to "hold" the cone using a screwdriver or similar.

Adjusting Bearings in Cheap Pedals - The Solution


The fact that this nest step involves using a drill should give a hint as to the gorilla tactics coming up!

In order to prevent over tightening you need to be able to stop the cone from tightening, when tightening the lock nut, to prevent this drill hole the size of a bicycle spocket or a small screw driver that lines up with the cone inside the pedal. If you are using clips / toe clips you can drill the hole in the underside of the pedal.


Step One - Drill a hole that lines up with cone inside the pedal.
Step 2 - Use a spoke or a thin screwdriver to hold the cone whilst tightening.

!!!!- You end up with a big hole in your pedal.

Adjusting Bearings in Cheap Pedals - Alternatives


Instead of fiddling about for hours to extend the life of £5 / $8 worth of hardware, why not bodge a little. Use a small grease gun to inject fresh grease in to your pedals.  Drill a hole in the centre of the cage body so you can inject grease in to the axle and out through the bearings.

Grease those pedals!
You can get a grease gun pre-loaded for a few pounds / bucks, and you will extend the life of you pedals 3 fold. Example below.


Sunlight and Daylight Assessment


Thursday, 19 June 2014

Choosing Chainsaw Guide Bar Length

Choosing Chainsaw Guide Bar Length - Intro


This is a guide for the confused armature / home use chainsaw operator. 

When replacing a worn out bar it may be tempting the increase the guide bar length, but this too is not always the best option.
 

Choosing Chainsaw Guide Bar Length - Guide Bar Length vs CC


From various forums and manufactures websites the below ranges are suggested for bar lengths relating to engine capacity. The below are sensible suggestion but obviously not set in stone, I run a 20" bar on a 36cc saw, and with a small chain its fine.

Tabulated Data - Lengths in Inches

Graphed Data - Lengths in Inches

Choosing Chainsaw Guide Bar Length - Based on Usage


The above method is all well and good but you pattern of usage should determine the bar length, for example a 12" bar would be a great choice on a low powered saw, it is nice and light and will not cause excessive drag, but will it be long enough a 30 year old pine, can be 14" and may involve two cuts to get through the trunk with a shorter bar.

Choosing Chainsaw Guide Bar Length - Conclusion


When deciding on bar length, try to think about what size you usually cut, and choose the shortest bar you can. Then add 2" to cover the occasional bigger cut. If you have two saws then perhaps you can set one up as a "long saw" and one as a "light saw".

Desktop Study

Flood Risk


Wednesday, 18 June 2014

Archer Chainsaw Chain & Chainsaw Guide Bar Review

Archer Chainsaw Chain & Chainsaw Guide Bar Review - Intro


After 12 months of use with terrible abuse on my part, my Stihl Chain and original Husqvarna guide bar were not behaving very well, a few weeks back the chain snapped I suspected a jammed nose sprocket and I was in the market for a new chain and whilst I was at it a new bar.

Ebay found me at  Mister Solutions shop which stocks a wide variety of chainsaw parts. Including a chain and bar combos for £16 - £22. As my aged Husqvarna 136 may give up the ghost any day, I do not want to spend out lots on replacement parts.

6 Month Update at bottom of Page

Archer Chainsaw Chain & Chainsaw Guide Bar Review - First Apperances


The bar was quite heavy. But I am young and fit so not to bothered about that. The build quality looks OK, the finish is fine.The below picture show the Archer (Australia) Chain (bottom) compared with the original used stihl chain (top).

Stihl Chain vs Archer Chain

The bar is failry stiff, I have increased the bar length with this replacement from 15" to 20" so not sure if the extra flew is due to the bar quality or the length.

Below are a series of picture showing the archer chain and archer bar.

Archer Guide Bar (Timber Max)

Archer Guide Bar - Nose Detail

Archer Chainsaw Chain - Chain Close-Up

Archer Guide Bar - Fixing

Archer Chainsaw Chain & Chainsaw Guide Bar Review - In Use


A new chain always cuts very well, and this archer chain was no exception, the chain is a .325 semi chisel and flew through the 14" pine trees I was cutting, on this occasion I made in region of 50 cuts working for around 2.5 hours, by the end of which the chain was stating to loose its edge a little, although still cutting well enough I would not consider sharpening.

I think I may have had some lubrication issues as the bar seemed to get quite warm during use, and chain would tighten as the guide bar warmed. I am not sure is this is normal behaviour for longer guide bars, but it could become a bit annoying.

Update 20/06/2014: This oiling issue is caused by the holes (for fixing and oiling) in the bar being different to the genuine original part. They do not line up quite right. The oiling hole is in the right place no worries there but the fixing hole is set too far of centre, and partially overlaps the oil out let, this causes most of the oil to flow out through the fixing hole, where it dribble in to the sprocket/ clutch area and gums everything up.I guess this problem arises from the fact that this bar is designed to fit around 70 different types of chainsaw, and as such compromises have been made. Some oil does get on the chain but not nearly enough.

Update 19/12/2014

BAR - The oiling issue  as described above does mean that the this bar would not be suitable for general use, the fuel and bar oil reservoirs should run dry at approximately the same time, but I often find that when using this archer bar the oil reservoir is still 3/4 full, when re-fueling. I use this bar for the occasional large diameter cut, then I swap back to the original bar.

CHAIN  - The Archer chain is excellent quality, and cuts and sharpens very well. I bought another chain for my standard husqvara bar and it is very good, and I will be buying again.

Archer Chainsaw Chain & Chainsaw Guide Bar Review - Conclusion

BAR - Not Great

CHAIN - Excellent

The boats not in yet, it was certainly cheaper than the next reputable brand as a bar chain combo in say Oregon would be in the region of £50. So only time will tell whether this was a good buy. They say buy cheap by twice, but owing to the age of my saw, well maybe I'll only have to buy once! Will update soon!

Sunlight and Daylight Assessment

Desktop Study 

Monday, 2 June 2014

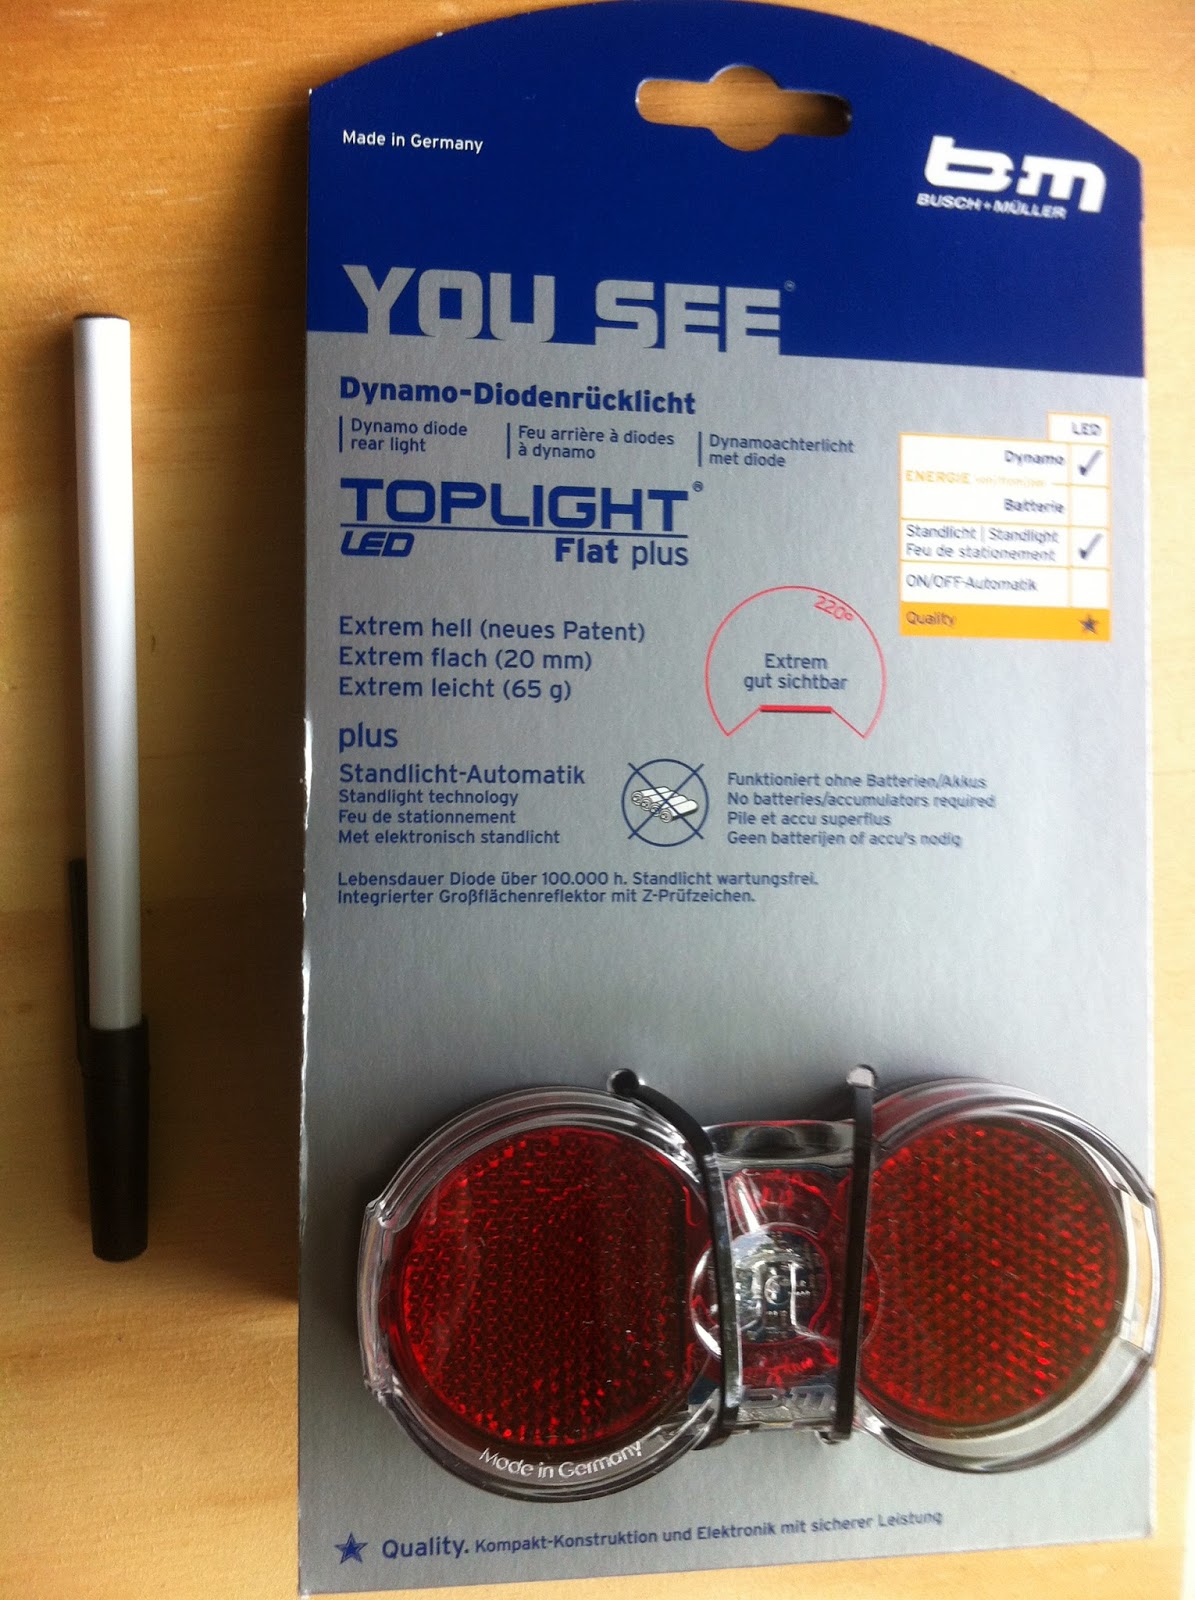
Bush + Muller Toplight Flat Plus Review

Bush + Muller Toplight Flat Plus Review - Intro

Rose bikes are selling these at knock down price at the moment, and have just sorted out a hub dynamo for my 16" folding bike, I was please to be able to choose a Bush + Muller offering at this price. They never disappoint.


Bush + Muller Toplight Flat Plus Review - Size and Fitting

Its a bit bigger than a Busch and Muller Toplight Plus andway smaller than a Axa / Basta Ray Steady so size wise it absolutely fine, it was a snug fit on the rear rack of my folding bike, and I had to make my own mounts.

The light comes with adaptors so it will fit 50mm and 80mm spacings.

The little clippy things that hold the wires in places could be better designed.


Bush + Muller Toplight Flat Plus Review - Performance

When compared to the Busch and Muller Toplight Plus this one only has one light source (plus has 2) but that being siad it chcuks out a lot of light illuminating the area to the rear of the bike, even when not fully dark.


Bush + Muller Toplight Flat Plus Review - Verdict

If you can get one for under mmmmmm £10 then go for it, if you are paying full price then provided you are not too vane perhaps consider offerings from union or axa, as they are better value.

If however you were prepared to pay full price you would receive a light that looks as though it would last a life time, it is very very very well built. Super tough.

Desktop Study

Axa Pico 30 Review

Axa Pico 30 Review - Intro

If like me you like dynamo light, you like cheap dynamo lights with stand lights then you may well have come across the Axa Pico 30 steady. It is a budget front light with features found on much more expensive ones.


Axa Pico 30 Review - Appearance and Features

The Axa Pico 30 looks small in the advertising pictures but in fact is of an average size, with a built in reflector. It has a power of 30 lumens, and as such is OK for unlit road cycling at moderate speeds.

It has a built in sensor to switch over from daylight running lights to the main beam when dark. It has a switch so you can turn it off, and most importantly (in my humble opinion) a stand light (that last for 4 minutes).

The are lesser versions available without standlights.


Axa Pico 30 Review - Performance

At 30 lux this is a moderately powered LED light. I have tried beam pics but I can never get a good picture.

I am powering this light with a Brompton Dynohub, a (DH-703-SB) which is is fine. Any budget shimano hub such as the DH-3N20 would do just fine.

Above 12 kph (jogging speed) you will enjoy a beautifully light road, stretching for 10-12 meters and a little dimmer after that.

Subjectively I would say it is a tad better than a B&M Lyt Senso, and about half as good as a B&M Cyo T which goes to show they have got the lux system figured out pretty well.

Axa Pico - On the bike
PS the above is a home made wheel, see my top tips on wheel building to find out more.

Axa Pico 30 Review - Conclusion

I bought this from rose bikes, it shipped from Germany in 48 hours (to the UK), and it cost £17 so yes fairly pleased. It is as good as a £25 light.

Thursday, 29 May 2014

Shimano Chain - Quality Comparison

Shimano Chain - Quality Comparison - Intro


I have recently worn out a HG53 9 speed chain on my commuter bike. It lasted about 2 years in country lane conditions. It has been kept clean compared to the average MTB chain, but with a good life span of 2 years I was wondering how the more expensive chain differ.

Shimano Chain - Quality Comparison - Grades

In 9 speed there are 3 grades of chain available:

HG53 - Labelled with Altus, Acera & Tigra on the Packet
HG73 - Labelled Deore, LX & 105 on the Packet
HG93 - Labelled XT, Saint and Ultegra

Below left to right XT, LX, Acera


Shimano Chain - Quality Comparison - Visual

So I have now tried all three types I have a new HG93, a new HG73, and a used HG53 pictured below for comparison. There is little difference between the HG73 and HG53, but the HG93 clearly has a superior finish. It looks good, I wonder whether it will last longer?

Below left to right XT, LX, Acera 


Shimano Chain - Quality Comparison - Stock Photos

HG53


HG - 73

Shimano Chain - Quality Comparison - Which one to Choose

I would probably opt for the HG 93 or the HG 53 I would pick from the cheapest or the best, the middle ground seems to offer little in the way of improvements over the budget chain.


Thursday, 15 May 2014

Wheel Building - Part 1 - Choosing Bits

Wheel Building - Part 1 - Choosing Bits - Intro

I have by trial and error built numerous wheel for my own personal use. Building your own wheels is very satisfying, and is surprisingly easy. But you will require patience.Key to this first chapter is the Edd Spoke Calculator. When choosing your rim, and particularly your hub, life will be a lot easier if you choose parts that are listed on Edd.


Wheel Building - Part 1 - Choosing Bits - Rims

Choosing rims is a matter of preference but also function. For example very wide rims may cause problems, particularly with rim brakes. For a hassle free experience try and match the width of rim you are replacing. But for the follwoing type of bike choose the folwwoing widths.

Racer - 13mm - 15mm
Hybrid - 15 - 19mm
MTB - 19mm - 27mm

The other dimension to look out for is the ERD (Effective Rim Diameter) which is the diameter of the rim from the inside. Its easy to measure, if you have a rim already.

Rims come with different numbers of holes. 36 is my favorite.

Wheel Building - Part 1 - Choosing Bits - Hubs

Choosing hub is largely preference but be careful to get the right width of hub. The Over lock dimension. Of course if you are replacing a hub, then try and match the existing.

Buy a branded hub, which has measurements in the listing;

  1. Left Flange & Right Flange (on most hubs these will be the same, but not always).
  2. Centre to left flange & centre to right flange ( these will often be different on disc hubs and cassette hubs)
 The above measurements are not critical if you are building from scratch and the world is you oyster. Choose away.

Wheel Building - Part 1 - Choosing Bits  - Spokes

When the going gets tough. Cheat.  Use the Edd spoke calculator to work out your spoke length.

You can select your hub and rim type if they are listed, or enetr your own measurements, using the green buttons.

To the left of screen there are some choices.
  1. Number of spokes. Thats easy. Count the holes. 
  2. Crosses. Pick 3 for anything larger than 16" or 2 cross for anything smaller. More crosses makes for a strong wheel. 
So hopefully you will now have all of your bits in the post. Most spokes come with nipples (the bits that screw on the ends) but some don't. For utility riding get 14 gauge stainless spokes. Butted spokes are fine if you have the money.

Spokes have around 8mm of thread on the ends and that allows for some error in spoke length.It also means that you can somtimes re-use spokes (yes it fine I have done it repeatedly) from an old wheel. For example a hub with a similar flange width could be reused with a rim and spoke combo. In fact if you re really stubborn you can get spokes to work in some very unexpected scenarios. See one of my first wheel builds.

Aiming for Functional turned out Funky !
Sunlight and Daylight Assessment